1. Use a fast memory card
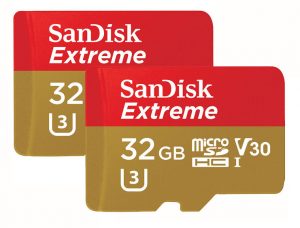
Before you even start, you’re going to want to ensure you are using a fast microSD card. By fast I mean a high write speed of 90mbps or more. This is important because most 360 camera record at a huge 4K resolution or above and most SD cards won’t be able to write such large files, causing your camera to stop recording after a few seconds.
I recommend the Sandisk Extreme, which has worked reliably on every 360 camera I’ve owned. Any MicroSD with a transfer speed of 95mbps or above should also work with all 360 cameras.
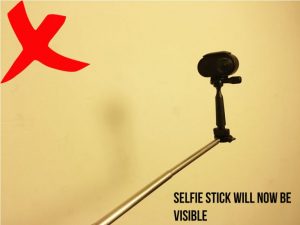
2. Invisible selfie stick
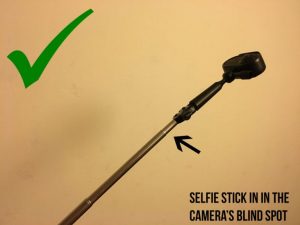
Want to completely hide your selfie stick and make it seem as if your 360 camera is floating in mid air? All you need to do is to move your camera into the camera’s blind spot.
This may seem unusual, as neither lens is pointed at the person, but remember that recording in 360 degrees means you are always in view of the camera regardless of where the lenses are pointed. The stabilization feature in the camera means that the video will be level even in this position. Using your camera like this will ensure that the selfie stick is within the small blind spot of the lenses.
3. Go hands free with pocket trick
Want both hands free while you shoot your 360 video? All of you need to to is to attach your 360 camera to a slim selfie stick and place it in your pocket. This works better in smaller pockets or tight fitting clothing that will hold the selfie stick in place. This method will also render the selfie stick invisible.
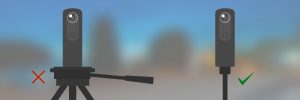
4. The best tripod for 360 cameras.
If you want to shoot a static 360 video, use a light stand instead of a tripod. Light stands, like the one shown in the below image, are perfect for shooting in 360 because they have no parts sticking out near the base of the camera that would become visible in the video.
5. Bring a cloth and clean the lenses often
All 360 camera have at least 2 large lenses that bulge out from the camera body, and you’d be surprised how easy it is to get your finger smudges all over them. I’ve learned the hard way that not cleaning your lenses often leads to ruined video.
Even a slight smudge can cause blurry and unusable footage, so every time you handle your camera, clear it with a cloth or at a last resort the sleeve of your shirt. Thankfully most 360 cameras come with their own lens cloth.

6. Keep your distance
There is no reason to have objects closer than 2ft from your 360 camera. The nature of 360 video means that anything close to your camera will appear distorted and cut in half. The distance at which this occurs largely depends on the exact camera you use, but to be on the save side I’d keep any objects or people at least a few feet away from the lenses.
7. Point the front lens at the action
360 video means the viewer can look anywhere at any time, but the starting point is the most important. Find the most interesting point in the environment you are shooting and make sure the front lens is pointed right towards it, this will ensure the video starts with this as the focal point. You can edit the starting position in a few programs, but this will at least save you some time.
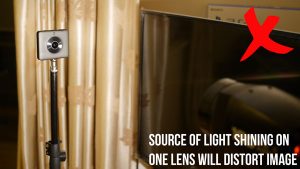
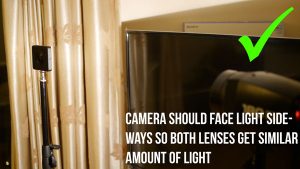
8. Keep light even over both lenses
One of the first things you should do when shooting 360 video is work out where the light is coming from, the make sure neither of the lenses are pointed right at it. If one lens is pointed directly at the main source of light and the other is therefore pointed furthest from it, the resulting 360 video is much more likely to have an obvious seam line where the images from both lenses meet.
To avoid this, make sure (as much as possible) that the main source of light is pointed at the cross section between each lens.